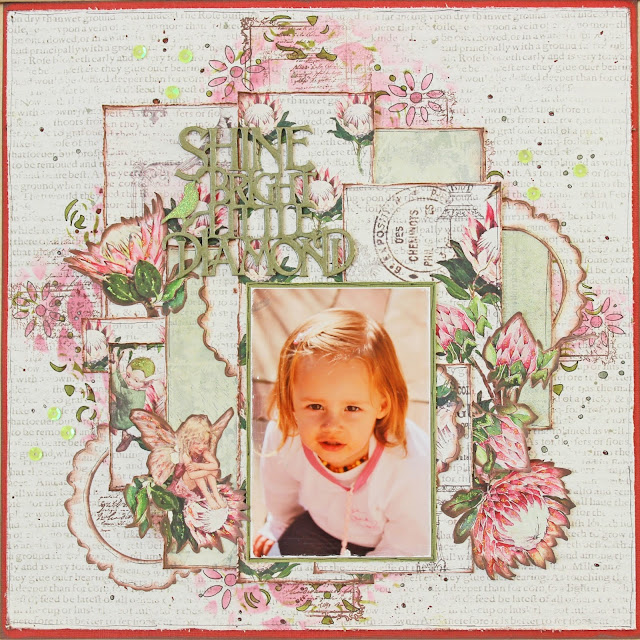
C88 | Single
Page Layout
by Lisa-Marie Watling
by Lisa-Marie Watling
Shine Bright Little Diamond
Materials:
Fabscraps C88 004
Starlight
Fabscraps
C88 003 Sprinkles
Fabscraps
DC88 003 Chippie – Shine Bright Little Diamond
Fabscraps DS
055 Stencil Filigree
Fabscraps DS
043 Stencil (Kaleidoscope collection)
Fabscraps
Cardstock – Burgundy
Fabscraps
MC88 001A Carder Pack
Cardstock –
pale olive
Mists –
cranberry and olive
Inks – plum,
olive, darkest brown
Glitter glue
– green, pink
Sequins –
green
Tombow glue
Glossy accents
Chippie
·
Coat your chippie with a few coats of olive
green mist. Apply green glitter glue to
the bird and coat the remainder with Glossy Accents. Once completely dry, cut from frame and set
aside
Base
Page
·
Cut C88 003 down to measure 11 ¾ x 11 ¾
inches. Chalk with brown, distress and
adhere, centred to your Fabscraps burgundy cardstock
·
Use both of your Fabscraps stencil and a
blending tool to apply a diamond shaped design to your background page – plum
inks and olive inks. Try not to use the
entire design here, but rather elements and shift your stencil around
·
Select your favourite script based stamp, and
randomly stamp (darkest brown) around your stencilled element
·
Apply random droplets of cranberry and olive mist
and set your base page aside to dry
Layering
·
Fussy cut some proteas and the fairy element
from C88 003 and C88 004.
·
Matt your photograph onto some olive cardstock
and distress the edges
·
Take two of the circular frame element die cuts
from your carders pack and cut them in half; chalk all edges with brown
·
With the layering, you will have to judge the
sizes based on your photograph. Working
from the photograph down, start to cut squares and rectangle shapes from
C88 004, C88 003 and two paper pieces (greenish side) from your
carders pack. Chalk all edges with brown
and distress before you adhere. As you
move through your stages of layering, tuck in and around them, your fussy cut
flowers and the circular element die cuts
Finishing
Touches
·
Adhere your title chippie above your photo,
slightly off centre, using Tombow
·
Using a fine tipped black pen, doodle a frame
around all your layered pieces, highlight some of the stencilled elements and
also around your base page
·
Apply swipes of glitter glue to your proteas and
the fussy cut fairy


No comments:
Post a Comment