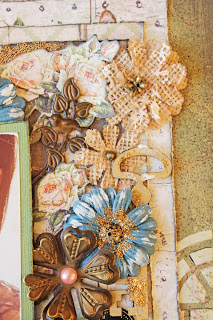
C85 Shabby rose Collection | Box Canvas
by Lisa-Marie Watling
Materials:
Fabscraps C85 003
Romantic Panels
Fabscraps
C85 004 Romantic Door
Fabscraps
DC85 001 Chippie Flower Frame
Fabscraps
DC85 003 Chippie Life Is Good
Fabscraps
DC85 010 Chippie Set – 2x Keys
Fabscraps
DS049 Stencil Arch Window
Fabscraps
Metal Trinkets – branch, large flower, Clock
Fabscraps
Pearls - pink
Green
cardstock
Selection of
flowers – Navy, Green, Blue, brown/red, Cream & Burlap
Chalk ink –
dark green, charcoal, gold, dark brown
Distress ink
– green and charcoal
Ivory and
clear UTEE / embossing powder
Gold Glitter
Gold and
green microbeads
Pink glitter
glue
Heavy white
gesso
Glossy
Accents
Tombow Glue
Glue gun
Foam tape
Chippies
·
DC85 011 Flower Frame: coat the chippie in
a thick layer of green chalk ink and then emboss with clear powder / UTEE. Apply a few strokes of Tombow around the
petals and the flower centres and sprinkle with gold glitter. Cut from the frame and use the frame in your
LO too, but coating it with dark brown chalk ink. Set both aside
·
DC85 003 Life is Good: coat with a thick
layer of green chalk and while still wet, sprinkle with a little ivory UTEE;
heat emboss and set aside
·
DC85 010 Two Keys: coat both keys with gold
chalk ink, swipe with Tombow and sprinkle over a little gold glitter. Set aside
Base
·
Apply a layer of green distress ink to the edges
and outer ‘frame’ of your canvas.
Randomly stamp and heat emboss on the inked section. Apply a few stencilled arched windows using
your DS 049 stencil and heavy white gesso; while still wet, apply a few
microbeads.
·
Once dry, apply a narrow frame of ink using
charcoal distress ink
Layering
phase
·
Cut C85 004 down to measure 10 x 10
inches. Chalk the edges with charcoal
ink and distress
·
Cut C85 003 down to measure 9.5 x 9.5
inches. Chalk the edges with charcoal
ink and distress. Centre and adhere to
the cut piece of C85 004, per above
·
Cut down a selection of narrow strips in various
lengths and widths from the remaining reverse sides of C85 003 and
C85 004. Chalk all edges with
charcoal ink and distress
·
Fussy cut some flowers from C85 003 and
chalk the edges with charcoal ink
·
Fussy cut two of the hinges from C85 004
and chalk the edges with charcoal ink
·
Mat your photograph on to green cardstock
·
Centre and adhere your large, cut C85 004
and C85 003 pieces to your base, using Tombow glue
·
Arrange your cut strips to this, and adhere
using Tombow glue
·
Centre and adhere your matted photograph to
this, using foam tape
Finishing
Touches
·
Arrange and adhere your flowers, fussy cut
flowers, metal trinkets and chippies around the top right and bottom left of
your photograph. Use a glue gun for this
·
Adhere the two fussy cut hinges to the top left
and bottom right of your arrangement; coat with Glossy Accents
·
Adhere your title chippie Life is Good to the
bottom right of your photograph
·
Apply some random swipes of Tombow around your
flower, chippie and trinket clusters and sprinkle with gold micro beads and
gold glitter
·
Apply light swipes of heavy white gesso to your
some of your flowers


No comments:
Post a Comment