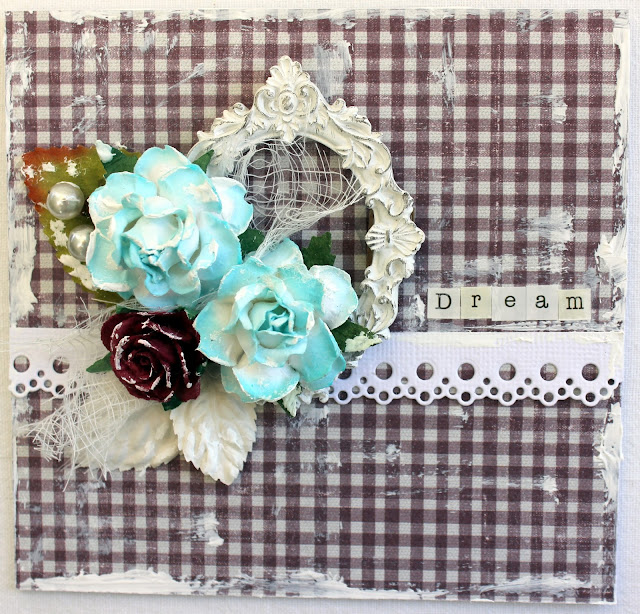
C87 Journey in Time Collection
– Dream card
– Michelle Frisby
For
This Project You Will Need
•
FabScraps
Journey in Time C87 008
•
Muslin
[cheesecloth], cardstock, leaves and flowers
•
Sentiment
– alpha stickers
•
Corrugated
cardboard packaging
•
Gesso
and a paintbrush
•
Resin
shape
•
Lace
edge metal die and cutting machine
•
White
cardstock
Instructions
for your tag
1.
Use C87
008 as your background paper. Cut across
approximately 2” from the bottom of your piece of patterned paper.
2.
Cut one
piece of white cardstock 10” wide by 5”.
3.
Score
in half.
4.
Take
another piece of white cardstock and cut the correct width of your card and
punch the lace edge strip using your die and cutting machine.
5.
Use a
little adhesive and layer between the two pieces of your patterned paper.
6.
Adhere
to the cardstock card base.
7.
Cut
two small pieces of corrugated cardboard packaging.
8.
Now
start to build your embellishment cluster.
9.
Adhere
a leaf and pearls to the left hand side of your card. Cut Adhere two pieces of corrugated cardboard
packaging under either side of our resin shape.
10.
Adhere
three flowers and just before you are totally happy with where they are
sitting, tuck under another couple of leaves and thread through a little muslin
[gently pull it apart a little].
11.
Adhere
a sentiment to the right hand side of your embellishment cluster. On this card I have used the alpha stickers
to make the sentiment word ‘dream’.
12.
Grab
some gesso and a paintbrush and randomly apply.
13.
All
done.


No comments:
Post a Comment