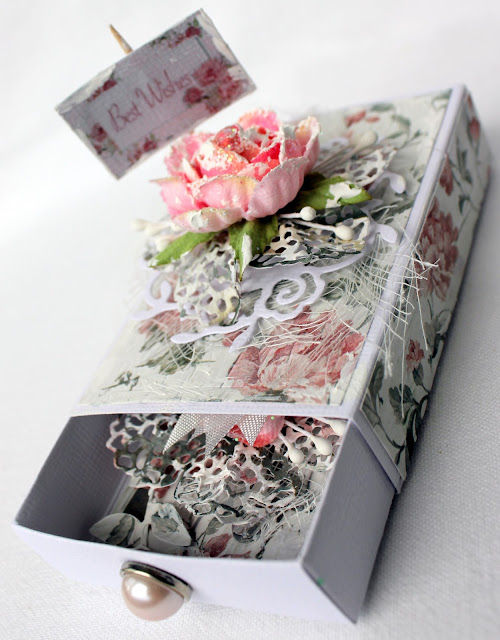
C85 SHABBY ROSE COLLECTION
Large matchbox box and tag –
by Michelle Frisby
For
This Project You Will Need
•
FabScraps
Peeled Roses – C85 001
•
Fabscraps
crystal bling
•
Stickers
ST85 002
•
Muslin
[cheesecloth], stamens, cardstock and flowers
•
Metal
foliage dies and a cutting machine
•
Matchbox
die
•
Toothpick
•
Paper
flower die
•
Doily
die
•
Gesso
•
Pearl
brad
•
Sentiment
Instructions
for your tag
1.
Use C85
001 as your background paper.
2.
Cut
two tag shapes, one with your paper and one on white cardstock to give your tag
a little more oomph.
3.
Adhere
paper tag to the cardstock tag base.
4.
Cut a
small square of corrugated card packaging to lift your embellishment cluster
that you are about to start to build.
5.
Cut
out a flower shape and manipulate [squash] with your fingers a little.
6.
Adhere
a little muslin [cheesecloth], your paper flower and foliage, some stamens, then
your flower.
7.
Don’t
forget to add a little Fabulous FabScraps bling.
8.
And
finally your sentiment along the top of your flower on your tag.
9.
All
done.
Instructions
for your matchbox
1.
Cut a
piece of C85 001 – use your matchbox die and construct.
2.
Cut
and measure three pieces of patterned paper and adhere to top and bottom of
matchbox and a slightly smaller rectangle and adhere into the bottom of the
inside of your drawer.
3.
Cut
and measure two long rectangles of pattered paper and adhere to each side of
the cover of the matchbox.
4.
Using
a doily die cut out a shape in white cardstock.
5.
Use a
small piece of corrugated cardboard and adhere in the middle of the top of the
matchbox cover, then adhere a little muslin, your doily, your patterned paper
flower, stamens and top with your flower.
6.
Grab
a toothpick – use one of the stickers from ST85 002 and adhere to a small piece
of white cardstock and then adhere to toothpick. Adhere this to the back of your embellishment
cluster to have it standing.
7.
Randomly
apply gesso.
8.
All
done.
Tuck your special tag inside your matchbox and it’s now
ready for gifting.


No comments:
Post a Comment