Thursday, 24 November 2016

C90 Christmas Snow Collection
 – Christmas cracker – 
by Michelle Frisby


For This Project You Will Need

•   FabScraps Christmas Snow collection Santa’s Wreath C90 008
•   Muslin [cheesecloth]
•   FabScraps bling
•   Catgut wire
•   Plastic snowflakes
•   Christmas baubles
•   Red faux branch
•   Petaloo flower
•   Red and white bells
•   Metal snowflake adornments
•   Aleene’s True Snow
•   Paintbrush
•   Ribbon
•   Corrugated cardboard
•   We R Memory Keepers candy box punch board


Instructions for your tag
1.              Use the C90 008 and your candy box punch board – punch out your Christmas cracker and fold according to the instructions.
2.            Cut burgundy coloured ribbon and tie each end of your Christmas cracker.
3.            Use a piece of corrugated cardboard [packaging] and use that as your base to build your topper or embellishment cluster.
4.            Adhere a piece of muslin [cheesecloth].
5.             Wrap a piece of red faux branch in a circle and adhere.
6.            Tuck in and adhere some Christmas baubles.
7.             Cut a piece of white cotton and tie on a red and white bell and a metal snowflake.  Adhere to your cluster.
8.            Thread some plastic snowflakes and adhere and also adhere a piece of FabScraps bling on top of each snowflake.
9.            Adhere a Petaloo bloom.
10.        Now adhere your whole embellishment cluster to the top of your Christmas cracker.
11.          Randomly apply True Snow with a paintbrush and let dry.

12.        Voila - you are done.


Monday, 21 November 2016

C90 Christmas Snow
Dream card – Michelle Frisby


For This Project You Will Need

•   FabScraps Christmas Snow collection MC90 001 carders pack
•   Muslin [cheesecloth], cardstock,
•   FabScraps bling
•   Catgut wire
•   Plastic snowflakes
•   Toothpick
•   Aleene’s True Snow
•   Paintbrush
•   Sentiment
•   Self adhesive pop ups
•   Decorative circle metal die and cutting machine


Instructions for your tag
1.              Use the snowmen paper from the Christmas Snow collection MC90 001 carders pack as your background paper.  Cut a piece of patterned paper 4 3/4” x 4 3/4” using the grey side.
2.            Use another piece of that same paper this time with the snowmen showing 4 ¼” x 4 ¼” cut a circle out of the middle of the paper – refer to picture.
3.            Cut one piece of white cardstock 9 3/4” by 5” in size. Score in half.
4.            Adhere your background paper to the top of your card [cardstock base].
5.             Cut another piece of white cardstock slightly smaller than your base paper and cut the scalloped edge circle out of the middle, refer to picture.
6.            Adhere your top layer of paper to the white cardstock and then using pop ups, place sufficient underneath that layer of cardstock all the way around to give your card a lift, if that makes sense.
7.             Cut out some of the gorgeous snowmen images and build a cluster of snowmen, muslin on the left hand side of your card.
8.            Underneath your images adhere a toothpick and adhere a Christmas sentiment towards the top of the toothpick.
9.            Adhere some muslin [cheesecloth].
10.        Thread some plastic snowflakes on some catgut wire and the then glue a Gorgeous FabScraps bling shape on the top of each of them.

11.          Randomly apply Aleene’s True Snow over your card and you are done.


SWEET BABY COLLECTION
Page Layout – Precious Baby
-Tanya Cloete-


For This Project You Will Need:

·         FabScraps Sweet Baby Collection paper range : C89 008
·         FabScraps Carders Pack MC89 001A
·         FabScraps Chipboard Pieces : DC89 001
·         FabScraps Sticker Sheet ST89 001 & 002
·         FabScraps FAB Stencils DS 058 & DS 012
·         Marianne Design Creatables Die Baby Sock / Baby & Safety Pin
·         Circle Punch 1.5”
·         Chipboard Frame
·         White & Blue Cardstock
·         Modeling Paste
·         Blue & White Acrylic Paint
·         White Flat Back Pearls, Gold Rhinestones, Blue & Brown Check Flairs & Trims

Instructions:
1.      Use white cardstock as the base/layout.
2.      Mix blue paint and modeling paste and add to the white cardstock using stencils 058 and 012 as per the picture. Leave to dry. Add white flat back pearls to the bubbles.
3.      Use on of the 6x6 pages and cut one from the carders pack MC89 001A in half and trim off the heart strips. Add to the page.
4.      Paint the chipboard frame with white paint and add a piece of blue cardstock behind it.
5.      Cut the word (Baby) from blue cardstock and the (Sock) from blue and white using the creatables die.
6.      Paint the frame from chipboard piece 001 with white paint and add the gold rhinestones.
7.      Punch 4 circles from sheet 008 with the circle punch.
8.      Add the die cuts from the carders pack and sticker 001.
9.      Arrange all the pieces and embellishments as you like or as per the picture and glue!
10.  All Done!


SWEET BABY COLLECTION
Page Layout – The Little Things
-Tanya Cloete-


For This Project You Will Need:

·         FabScraps Carders Pack MC89 001A
·         FabScraps Chipboard Pieces : DC89 001
·         FabScraps Sticker Sheet ST89 001
·         FabScraps FAB Stencils DS 058 & DS 045
·         Marianne Design Creatables Die Baby Carriage
·         Kaisercraft Decorative Word Die The Little Things
·         Chipboard Frame
·         White & Pink Cardstock
·         Modeling Paste
·         Martha Stewart Acrylic Paint Ballet Slipper
·         Pink & White Acrylic Paint
·         White Flat Back Hearts & Pearls, Pink Rhinestones, Flowers, Diamond String, Pink Heart, Paper Straws &Trims

Instructions:

1.      Use white cardstock as the base/layout.
2.      Mix pink paint and modeling paste and add to the white cardstock using stencils 058 and 045 as per the picture. Leave to dry. Add rhinestones to the flowers.
3.      Cut the 6x6 pages from the carders pack MC89 001A in half and trim off the heart strip. Add to the page.
4.      Paint the inner pieces of chipboard piece 001 with ballet slipper.
5.      Paint the chipboard frame with white paint and add a piece of pink cardstock behind it.
6.      Cut the word (The Little Things) from pink cardstock using the decorative word die.
7.      Cut a baby carriage from pink and white cardstock using the creatables die.
8.      Add the die cuts from the carders pack and sticker 001.
9.      Arrange all the pieces and embellishments as you like or as per the picture and glue!
10.  All Done!


C89 Sweet Baby Collection

OTP – Photo Box

by Lisa-Marie Watling


Materials:

Fabscraps C89 002 ABC Blocks
Fabscraps C89 001 Playtime
Fabscraps C89 004 Vintage Prams
Fabscraps C89 005 Plane Around
Fabscraps C89 007 Boys Playtime
Fabscraps C89 007 Toy Cars
Fabscraps C89 008 Stop & Go
Fabscraps DC89 002 Chipboard Album cutouts
Fabscraps DC89 006 Born to Sparkle chippie
Fabscraps MC89 001A Carders Pack
Pale pink cardstock
Paper Roses & Flowers – pink and blue
Metal trinkets – zip, flowers, butterflies, dragon flies, glass bulb
Foam tape
Heavy white Gesso
Mist – darkest brown and caramel
Caramel chalk
Broad hessian ribbon
Tombow
Glossy Accents
Foam tape


Directions

·                Spray your title chippie and four of your chipboard albums heavily with darkest brown mist and allow to dry
·                Once your title chippie has dried, coat it with Glossy Accents; once dried, remove from frame
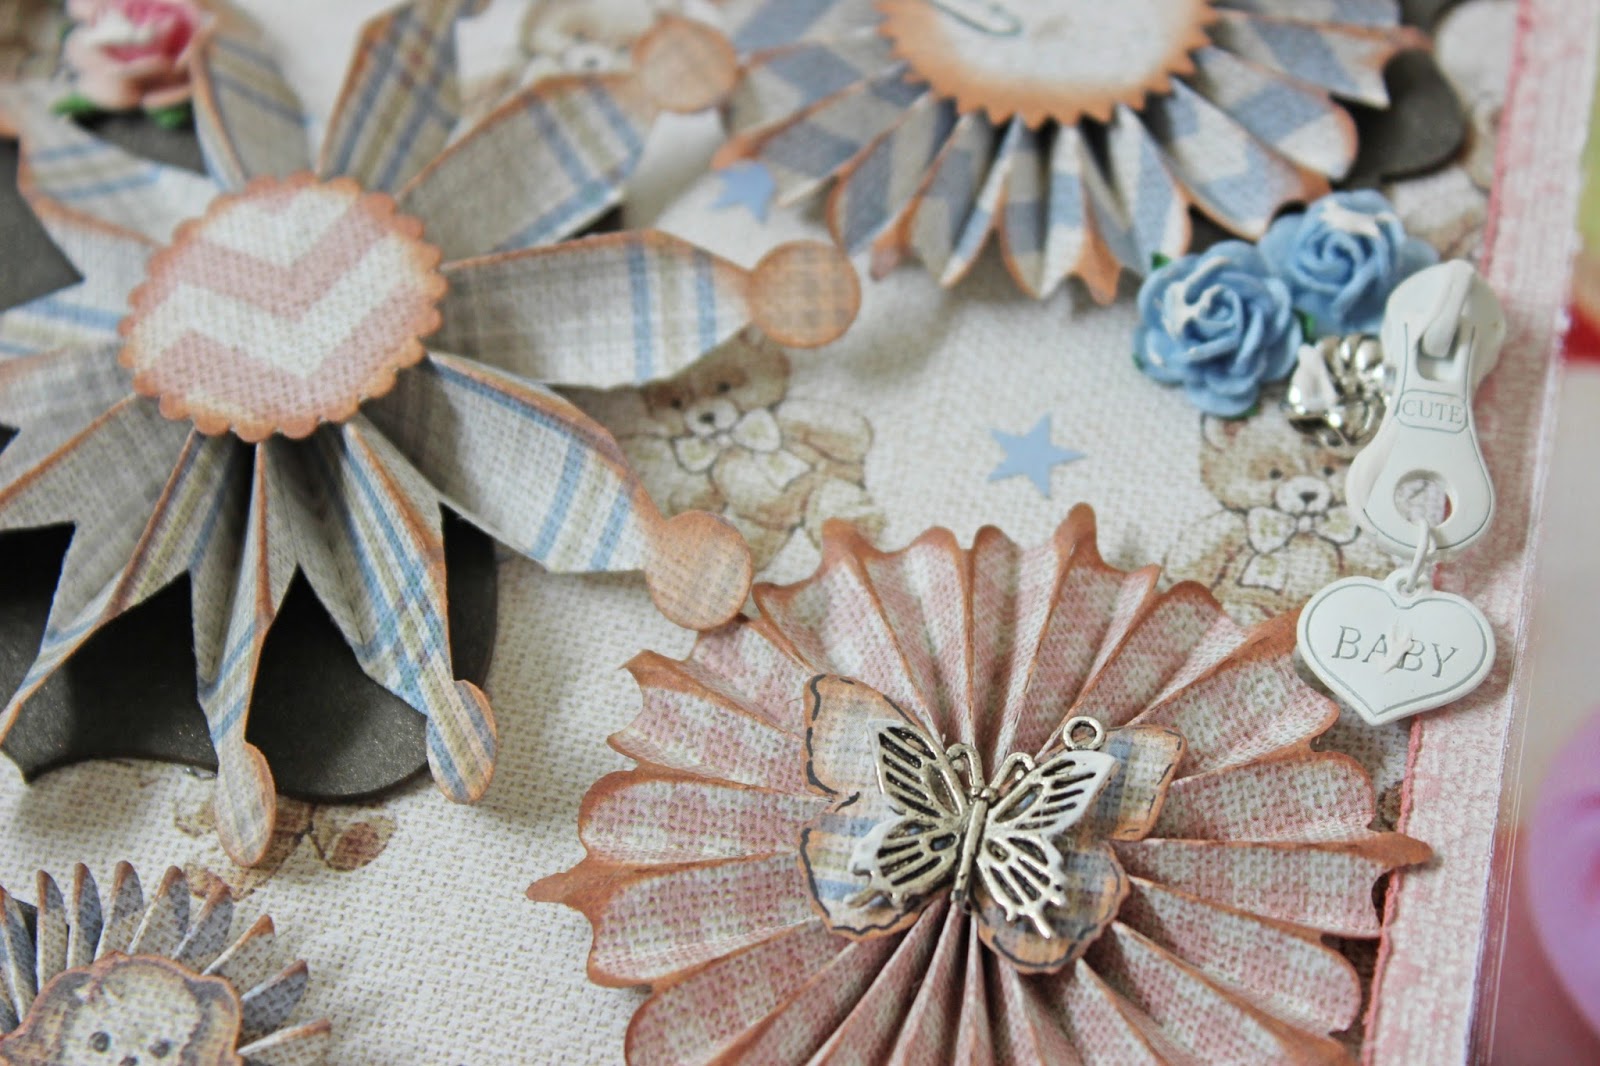
·                Cut six rosettes in various sizes using C89 002 ABC Blocks (chevron), C89 002 Playtime (gingham),C89 005 Plane Around (chevron) and C89 008 Stop & Go.  Chalk all edges with caramel
·                Spray your box liberally with caramel and allow to dry before you proceed
·                Measure the inside of your box and cut down C89 004 Vintage Prams (polka dots) to fit.  Chalk the edges and distress before adhering it to the inside of your box
·                Cut an 11 inch diameter circle from C89 007 Toy Cars (teddy bears) and cut off about one third.  Chalk the edges with caramel, distress and then adhere to the left hand side of your box inner
·                Fussy cut out two little stuffed animal shapes from a page of the Carders pack and adhere these to the centres of your smaller rosettes
·                Arrange and then adhere your chipboard cutouts and your rosettes on the 2/3rd circle that you have adhere to your box inner
·                Mat your photograph to a piece of pink cardstock and adhere it to the right of your rosette clusters, centred, using foam tape
·                Attach a large bow to the bottom right of your photograph and adhere a few small flowers and metal trinkets around the rosette clusters
·                Adhere your title chippie towards the bottom of  your piece, slightly off-centre

·                Lastly, cut two ‘heart’ strips from C89 002 Playtime and adhere one strip each to the top and bottom frame edge of your box