Wednesday, 25 January 2017

C91 Calls from the Wild CollectionLayoutby Kim Herbst


What you will need:

C91 001 Threatened
MC91 001A Carder Kit
CC 013 cardstock Espresso
C91 004 Survival
DS 061 wild footprints Stencil
DC 91 00 Buffalo Title
ST 91 002 lion sticker on for tag
Aloe and deco chipboard
Martha Steward Punch
Tin Strip
Black butterfly strip
Coloured straw
Black and clay cardstock
Green ink sprays
Alcohol Ink Lettuce, Gold
Ink Chalk Yellow, Olive, Burnt Sienna, dark brown
Clear Embossing Power
Acrylic Coarse Texture Paste
Semi-precious stones
Charms,
Seed beads
Ribbon
Leather flower
Orange acrylic flower

Instructions:

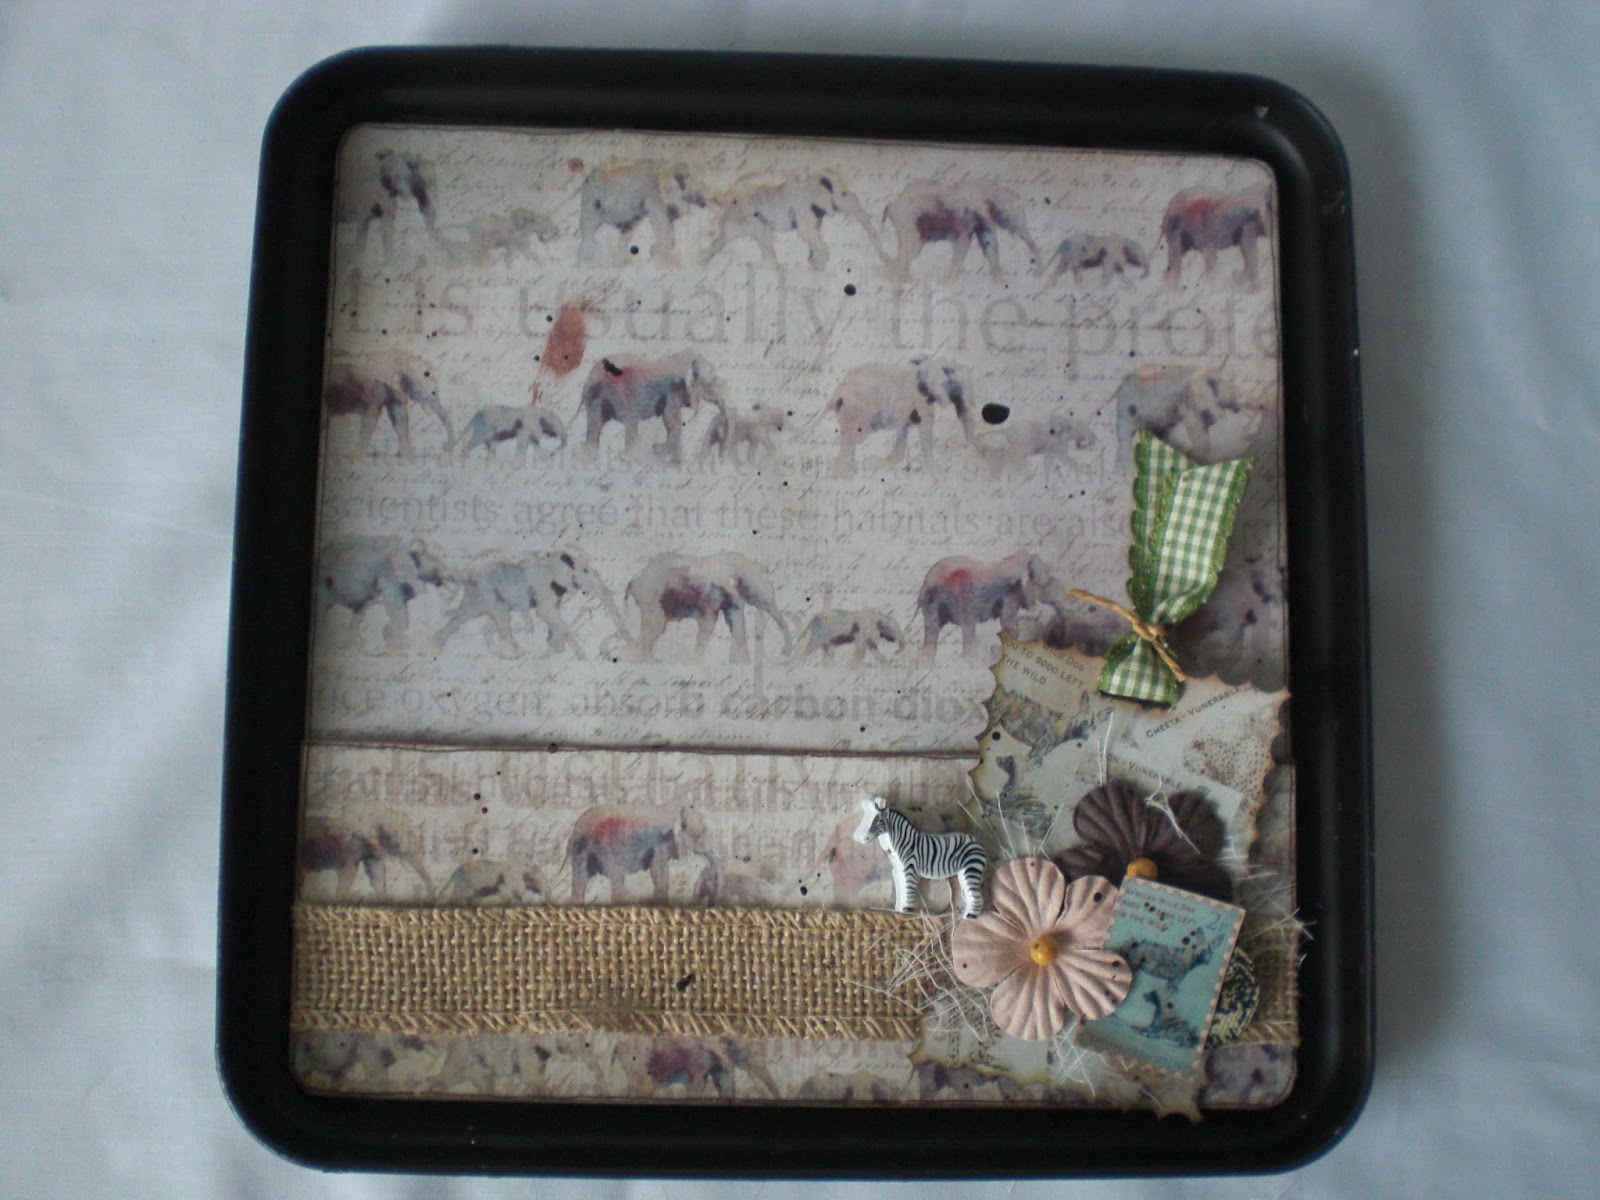
Use Espresso as background. Cut C91 001 11 ¾” X 11 ¾”. Using Punch on the top left and the bottom right. Ink the edges with yellow and burnt sienna, then adhere to background.

On the top left, place the black butterfly strip then the coloured straw then deco piece with small charm. Add small piece of the ribbon on end.

Ink the title and the aloes in green sprays, chalks and seed beeds

Cut C91 004 to 10” X 5” back with black cardstock. Place this 1” from the left, 3” from the top. Cut Clay 6 ¼” X6 ¾” placing this on the right with Buffalo and charm flower on the left. Then add MC 91001A on top of clay cardstock with pocket from the carder kit to the right adding tag. Then your photo with charm and orange flower.

On the left edge of MC 91 001A Stencil first a row of hooves in clear embossing power and then with texture paste. Add the aloes and coloured straw. The tin edge on the open bottom area of the clay with ribbon. Lastly semi- precious stones and leather flower.


Lion Layoutby Dana TatarC91 Call From The Wild Collection


To create this layout you will need:

Call from the Wild – Vanishing C91 003
Call from the Wild – Protected C91 005
Call from the Wild – Chipboard Album DC91 001 (Paw Print Chipboard Piece)
Call from the Wild – Lion Chipboard Word DC91 005
Call from the Wild – Carder's Pack MC91 001A (Africa's Pride Tag)
Call from the Wild –  2Trees Chipboard DC91 012 (Large Tree Plus Frame)
Call from the Wild – Clear Stickers ST91 001
Call from the Wild – Wild Footprints Stencil DS 061
FabScraps Wood Button
Corrugated Cardboard
White Cardstock
Paper Leaves
Green Corrugated Letters to spell “Africa”
Burlap Ribbon
Twine
Dye Ink – Black, Brown, Green
Glaze

Directions:

1.      Tear a circular shape from the top of a piece of Vanishing patterned paper. Apply brown and green dye ink to the edges of both pieces of patterned paper. Glue the larger bottom half of the patterned paper, green side up, onto a piece of Protected patterned paper.

2.      Tear a piece of corrugated cardboard approximately 4 inches wide and 12 inches long. Apply brown and green dye ink to the edges of the cardboard. Glue to the bottom of the layout, about 1 inch up from the bottom edge of the paper.

3.      Attach the smaller piece of Vanishing patterned paper from Step 1 along the bottom of the corrugated cardboard, straight edge down.

4.      Apply several shades of green dye ink to the leaves of the large Tree Chipboard. Apply brown dye ink to the trunk of the large Tree Chipboard. Cover the chipboard tree with glaze. Let dry. Glue the tree to the center of the embellished piece of corrugated cardboard.

5.      Gather green corrugated letters to spell the word “Africa.” Apply brown dye ink to the edges of the letters. Glue the letters along the bottom of the embellished corrugated cardboard piece.

6.      Apply a clear lion sticker to a piece of white cardstock. Cut out. Glue the sticker to the bottom right corner of the embellished corrugated cardboard piece.

7.      Cut several green paper leaves in half. Glue the leaves behind the torn patterned papers and corrugated cardboard on the page.

8.      Cut two pieces of burlap ribbon to measure about 6 inches long. Glue the ribbon behind the top left and bottom right corners of the corrugated cardboard piece.

9.      Use black dye ink and the Wild Footprints Stencil to add lion prints along the top edge of the Vanishing patterned paper.

10.  Create a photo frame from the 2 Trees Chipboard waste and the paw print from the chipboard album. Glue the paw print to the top right corner of the chipboard frame. Color the chipboard with brown dye ink. Tuck a photo of a lion into the frame and glue to the center of the layout.

11.  Apply brown dye ink to the edges of an Africa's Pride tag. Tie a piece of twine through the hole in the top of the tag and into a knot. Tuck the tag behind the left side of the photo. Glue a wood button to the bottom of the tag.

12.  Color the Lion Chipboard Word with dye inks. Apply a layer of glaze and let dry. Glue the chipboard word along the top of the photo frame, just to the left of the paw print.

13.  Tear a piece of the Vanishing patterned paper into a small triangle. Apply brown dye ink to the edges of the piece of paper. Glue the paper piece to the top edge of the layout, just left of center.


Tuesday, 24 January 2017

C91 Calls from the Wild Collection

Layout

By Ada Nicholls 


Requirements:
Paper:  2 x plain rustcardstock, 2 x C91 004 (Survival), 1 x C91 006 (Extinction), 2 x C91 001 (Threatened) (reverse cream mottled), 1 x C91 003 (striped), 3 x cards from the card pack MC91001A
Photos: 3 x 4 x 6’’ portrait, 3 x 4 x 3’’ landscape.
Chipboard : DC91 010 – Africa tags, DC91 – 007 – Elephant, DC91 006 – Leopard, Africa chipboard.
Embellishments :Wooden medal.
Stencil :Stencil – Footprints stencil (DS061 )
Extras : White texture paste

INSTRUCTIONS :

·         Cover the chipboard with the paper elements.
·         Paint the trees and the title with colour of your choice.
·         Dab texture paste on the chipboard.
·         Spray a little turquoise on the page as shown on the picture.
·         Matt all the photos on the C91 001 pattern paper.

Left page :

·         Use the C91 004 (Survival) and cut it to 11 ¾ x 11 ½ ‘‘. Stick it on the rust against the right edge.
·         Use the reverse of the C91 001 and cut 2 strips 1 ¼ x 11 ¾’’. Stick on thre page about 4 ½’’ fro the bottom edge.
·         Use the striped pattern and cut a piece 1 x 11 ¾’’. Use the decorative punch and punch the one end.
·         Use the C91 006 (Extinction) and cut a piece 6 x 3’’. Cut a ‘’v ‘’ at the left end.
·         Add thee photos as shown on the page.
·         Add the rest of the embellishments as shown on the picture.
·         Use the stencil and do the masking on the page.

Right page :

·         Use the C91 004 (Survival) and cut it to 11 ¾ x 11 ½ ‘‘. Stick it on the rust against the left edge.
·         Use the reverse of the C91 001 and cut 2 strips 1 ¼ x 11 ¾’’. Stick on the page about 4 ½’’ from the bottom edge.
·         Use the striped pattern and cut a piece 1 x 11 ¾’’. Use the decorative punch and punch the one end.
·         Add the rest of the embellishments as shown on the picture.
·         Add the photos as shown on the page.
·         Use the stencil and do the masking on the page.


************************************
CALL FROM THE WILD COLLECTION
Gazebo Lamp
-Tanya Cloete-


For This Project You Will Need:

·         FabScraps Call from the Wild Collection paper range : C91 001, 002, 003, 004 & 008
·         FabScraps Chipboard Pieces : DC 91 003, 004, 005, 006, 007, 009 & 010
·         FabScraps Carder’s Pack MC91 001A
·         Silhouette Cameo
·         Couture Creations Die Classic Leaf
·         Cottage Cutz Die Spruce Stems
·         Battery Operated Tea Light
·         Brown and Green Cardstock
·         Vellum
·         Tim Holtz Distress Stain Picket Fence
·         Tim Holtz Distress Ink Brushed Corduroy and Forest Moss
·         Glossy Accents
·         Metal Embellishments, Beige Flat Back Pearls, Door Knob, Hessian Ribbon, Grass String, Resin Africa and Big 5 Emebllishments, Guinea Fowl Craft Feathers and Porcupine Quills

Instructions:
1.      Silhouette Cameo:
·         Cut a 3D Gazebo from sheets 001, 002, 004 and cut the bottom piece from brown cardstock. Remember to cut a hole in the centre as well for the battery operated tea light to fit. Assemble accordingly. Add the vellum pieces to the opening sections of the gazebo. Add the door knob ontop.
2.      Cut approx 30 leaves using the classic leaf die from the sheets 002, 003 & 008. Ink the edges with brushed corduroy.
3.      Cut approx 18 spruce stems from brown and green cardstock.
4.      Add the matching die cut from the carder’s pack to chipboard piece 010 and ink the edges with brushed corduroy.
5.      Add the matching die cut from the carder’s pack to chipboard piece 009 as per the picture. Add this to chipboard piece 010 and then add the resin africa embellishment.
6.      Attach some guinea fowl feathers to the 2 porcupine quills (for each side as per the picture) with grass string.
7.      Ink chipboard pieces 003, 006 and 007 with distress stain picket fence top section only. Ink the bottom section with brushed corduroy. Add glossy accents and leave to dry.
8.      Ink chipboard pieces 004 and 005 with distress stain picket fence top section only. Ink the bottom section with forest moss. Add glossy accents and leave to dry.

9.      Arrange all the pieces and embellishments as you like or as per the picture and glue!
10.  All Done!


C91 Calls from the Wild Collection
Card - Enjoy the Journey
By Lisa-Marie Watling


Materials:
Fabscraps C91 004 Survival
Fabscraps DC91 013 Chippie – Jeep
Fabscraps MC91 001A Carders Pack
Cardstock : olive green and dark beige
Title stickers : Enjoy The Journey
Chalk : lightest beige, green and brown
Coloured Pencils : brown, green, black, beige
Glitter glue : white, yellow and orange
Tombow glue
Glossy accents
Foam dots


Method

1.              Coat your vehicle chippie liberally with palest beige chalk.  Then use your coloured pencils to colour in the various details. Coat the entire chippie with Glossy Accents once done and then set aside to dry
2.              Cut your green cardstock down to measure 12 x 6 inches; score down the centre to create your base card
3.              Cut a  square measuring 5 ¾ x 5 ¾ from C91 004 (green side up); chalk with brown, distress the edges and then centre and adhere to your base card
4.              Cut a sheet from your Carders pack to measure 5 ¼ x 5 ¼ inches; chalk with brown, distress and then centre and adhere to the base you’ve created above
5.              Cut another piece from your Carders pack to measure 4 ¼ x 4 ¾ inches.  Chalk with brown and distress the edges.  Fold over the upper left hand corner and then adhere it to the left of the card you’ve created above
6.              Adhere your title stickers down the ‘gap’ that has been created beside the piece in point 5 above, using foam dots
7.              Finally, cut your dried vehicle chippie from its frame and adhere it to the centre of your card, at a slight angle

8.              As a finishing touch, add some glitter glue into the headlights and indicators


C91 Calls from the Wild CollectionAfrican Adventures Mini Album and Altered Tin
by Jeanine de Bruyn


You will need:       Calls of the wild carders pack MC91001A
                               Africa album DC91 001
                              Stamp stickers ST91 002
                              Chipboard pieces DC91 009, DC91 012,DC91 008, DC91 010
                              Stencil DS 062
                              Tin big enough to fit the album into
                              Papers- Extinction C91 006, Vulnerable C91 008, Vanishing C91 003,
                              Endangered C91 007,Threatened C91 001, Conservation C91 002.
                              Paint, string, ribbons, flowers and embellishments of your choice

Directions: 

I began by painting my tin with black gesso. I then covered the front and sides of the tin with the patterned papers. I also covered the inside of the lid and the inside of the tin with the patterned papers.

I painted and embossed the large chipboard tree (DC91 012) and the title ‘Africa’ (DC91 008). Then I glued one of the cut out Rhinos from the carders pack and one of the Africa shapes to the corresponding chipboard pieces. I tore small pieces from the patterned papers and glued them to the lid of the tin at the bottom and added some gauze then glued down the tree and the Rhino. To the top right of the tin I glued the Africa shape and then the title Africa over it. I also attached a handle to the ‘top’ of the tin. Lastly I splattered brown and black paint over the tin.

On the inside lid of the tin I created a pocket to add extra photos or memorabilia. To embellish the pocket I added one of the ‘stamp’ die cuts from the carders pack, some flowers, one of the stamp stickers from the sticker sheet, a button and some hessian ribbon   from my stash to finish off the pocket. Lastly I splattered paint over the inside of the tin.

To make the album I sprayed the front cover of the album with a stone spray paint that I have had in my stash for ages. I then used a serviette that had an image of an elephant on it and modge podged it to the front of the cover. I painted and embossed the small tree from the chipboard piece (DC91 012) and added it with a rub on from my stash above the elephant.

I painted all the pages of the album with brown paint then added patterned papers from the collection to most of the pages except for the last page this one I painted with some blue, green and white paints then sprayed over the stencil (DS 062) with the stone spray paint. I added a photo mat made from brown cardstock, some torn pieces of patterned paper and some tags above and behind the photo mat to finish off the page.

I just loved this paper range and really had a lot of fun creating this mini, I hope you are inspired by this project to create an amazing album for yourself.


C91 Calls from the Wild Collection

Layout

By Ewelina Gryglak


For this layout you will need:

Protected paper C91 005
Conservation paper C91 002
Chipboard die-cut AFRICA DC91 008
Chipboard die-cut BAOBAB DC91 012
Stencil DS 061 C91 range

Other products: clear matte gesso, texture paste, lace ribbon, white water-based paint, colour co-ordinating gouache paint (amber), white acrylic ink, texture stamps and black archival ink, double-sided tape, glue

Instructions:

PREPARATION:
Paint the Chipboard die-cut AFRICA DC91 008 with white acrylic ink; once dry, watercolour with amber gouache paint.

STEP 1:
Your base page is Protected paper C91 005, the rhino side up. To make sure the wet mediums don’t soak through the page, prime it with a layer of clear matte gesso (that will make it waterproof but will not fade out the original paper design).

STEP 2:
Once dry, draw a frame around the page using black Sharpie.
Add the stamp designs around the centre area where your focus will be.

STEP3:
Run the texture paste through the Stencil DS 061 C91 range – the hooves design only – do it across the page in 5-6 rows of various length. The stencil doesn’t need to be perfectly filled with the paste as it’s to create the impression of real hoof-prints.

STEP 4:
While the ‘stamp’ is drying, spray the white paint to add colour and texture around the stencilled design and where your photo will be attached. Gradually add watered-down amber gouache paint to create layers of colour. Leave to dry.

STEP 5:
Cut the Conservation paper C91 002 into strips of various length and width. You will use both sides of them when building the paper cluster. In black pen, draw frames on some of them. With a circle paper punch, punch circle designs in some of the strips.
Assemble into a paper cluster and staple the layers together.

STEP 6:
Attach the paper cluster to the page.
Glue the bigger Chipboard die-cut BAOBAB DC91 012 in between the layers.

STEP 7:
Attach the photo on top of the paper cluster.
Glue the smaller Chipboard die-cut BAOBAB DC91 012 on the corner of the photo.

STEP8:
Attach the earlier prepared Chipboard die-cut AFRICA DC91 008 on the side of the photo and on top of the horizontal paper strips from the cluster.


Good job!