Wednesday, 31 August 2016

C88 FLORAL DREAMS COLLECTION
 Gift box and tag 
by Michelle Frisby


For This Project You Will Need
   FabScraps Floral Dreams – C88 004
   Fabscraps crystal bling
   Staz On back ink pad
   Self adhesive mesh
   Cotton, muslin [cheesecloth], stamens, cardstock and flowers
   Metal foliage dies and a cutting machine
   Doily die
   String
   Pearls


Instructions for your tag
1.              Use C88 004 as your background paper – front side.
2.            Cut two tag shapes, one with your paper and one on white cardstock to give your tag  little more oomph.
3.            Adhere paper tag to the cardstock tag base.
4.            Ink around the edges with Staz On black ink.
5.             Adhere a little self adhesive mesh directly to the tag.
6.            Cut a small square of corrugated card packaging to lift your embellishment cluster that you are about to start to build.
7.             Then adhere a little more adhesive mesh, a little muslin [cheesecloth], some stamens, a little paper foliage and then your flowers.
8.            Don’t forget to add a little Fabulous FabScraps bling.
9.            And finally your sentiment along the bottom right hand side of your tag.
10.        All done.

Instructions for your gift box
1.              Cut a piece of C88 004 – 7 inches square.
2.            Using a gift box scoring device follow the instructions and make the necessary folds and assemble.
3.            Cut out a doily using C88 004 and adhere to the bottom of the gift box and fold around the bottom edges.
4.            Tie string round the bottom.
5.             Adhere pearls and flower.

6.            All done.


C85 SHABBY ROSE COLLECTION
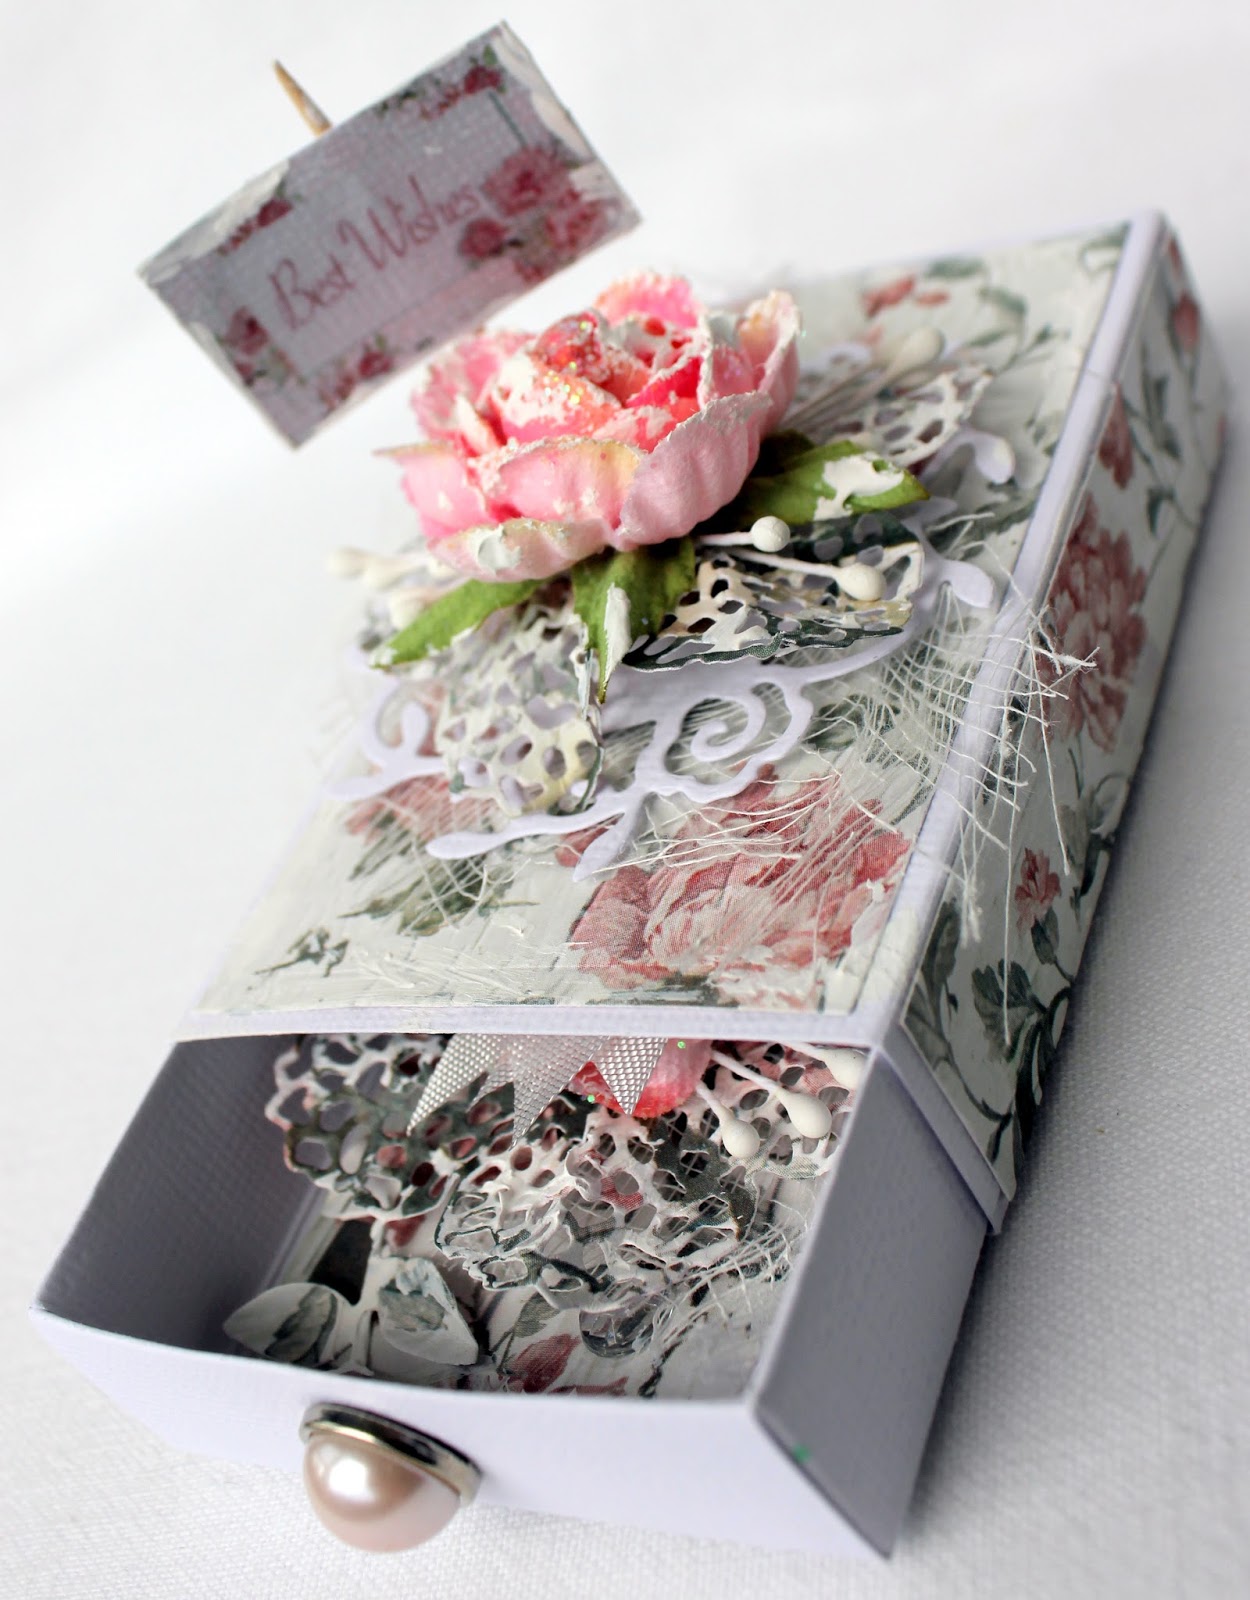
Large matchbox box and tag – 
 by Michelle Frisby


For This Project You Will Need

   FabScraps Peeled Roses – C85 001
   Fabscraps crystal bling
   Stickers ST85 002
   Muslin [cheesecloth], stamens, cardstock and flowers
   Metal foliage dies and a cutting machine
   Matchbox die
   Toothpick
   Paper flower die
   Doily die
   Gesso
   Pearl brad
   Sentiment


Instructions for your tag
1.              Use C85 001 as your background paper.
2.            Cut two tag shapes, one with your paper and one on white cardstock to give your tag a little more oomph.
3.            Adhere paper tag to the cardstock tag base.
4.            Cut a small square of corrugated card packaging to lift your embellishment cluster that you are about to start to build.
5.             Cut out a flower shape and manipulate [squash] with your fingers a little.
6.            Adhere a little muslin [cheesecloth], your paper flower and foliage, some stamens, then your flower.
7.             Don’t forget to add a little Fabulous FabScraps bling.
8.            And finally your sentiment along the top of your flower on your tag.
9.            All done.

Instructions for your matchbox
1.              Cut a piece of C85 001 – use your matchbox die and construct.
2.            Cut and measure three pieces of patterned paper and adhere to top and bottom of matchbox and a slightly smaller rectangle and adhere into the bottom of the inside of your drawer.
3.            Cut and measure two long rectangles of pattered paper and adhere to each side of the cover of the matchbox.
4.            Using a doily die cut out a shape in white cardstock.
5.             Use a small piece of corrugated cardboard and adhere in the middle of the top of the matchbox cover, then adhere a little muslin, your doily, your patterned paper flower, stamens and top with your flower.
6.            Grab a toothpick – use one of the stickers from ST85 002 and adhere to a small piece of white cardstock and then adhere to toothpick.  Adhere this to the back of your embellishment cluster to have it standing.
7.             Randomly apply gesso.
8.            All done.


Tuck your special tag inside your matchbox and it’s now ready for gifting.

Berries and kisses ....


Post done by Michelle Frisby


Sometimes you receive a collection of papers and you have so many ideas running through your head and you really just don't know which direction you should take.

Sometimes you receive a collection of papers and you just go for it.

A bit like this collection from FabScraps - C86 - Mother Earth Collection.

I saw the papers, I had been doing a little retail therapy, saw something else, had a special day coming up and everything just fell into place really.

Love you ...


Take one glass jar with a stainless lid.

Cut a piece of patterned paper C86 008 - Berry Bliss 5 inches by 12 inches.

Now cut another piece of the same paper 5 inches and say 4 inches and using a lacy doily punch, punch the edge, tuck it under the large piece of paper and adhere.

Why, because the diameter was a wee bit more than the 12 inches and you would have had a gap.

See that lacy edge?


Cut a circle of the same paper and adhere to the top of the lid leaving a little of the stainless on the lid free to see the edge of it poking out.

Cut out two hearts from corrugated cardboard packaging - tear a little of the top layer.

Cut another two hearts using your patterned paper and tear roughly
 and adhere to the packaging hearts.


Tie a backboard shape using twine around the front of your jar.

I've used a shaped die and cut out the shape on white cardstock and then again using the Berry Bliss patterned paper and adhered together for stability.

I've used a 'love' word punch and punched out on white cardstock and again layered a couple of the words for thickness and stability.

Adhere to the top of the die cut scroll and then adhere to the top of the chalkboard sign.

I've then used small alpha stickers and added the world 'you' underneath.

A pink peg to the top of the left hand side completed the chalkboard.


On top of the patterned paper on the lid I have built a cluster of embellishments using Petaloo fruit vines, leaves, muslin [cheesecloth], flowers and my hearts.

Randomly apply gesso.


Here you go ...


and tucked inside - a jar full of wild berries [lollies] and chocolate Hershey kisses

A gift for my darling husband - berries and kisses.

Happy 30th wedding anniversary Mr Friz.

I will always love you.

Yesterday, today and tomorrow.

For all the days before and all the days to come.

You are my world.

Forever.


Happy creating.

Michelle [aka Mrs Frizz]
C85 SHABBY ROSE COLLECTION
TAG DUO 
– Michelle Frisby


For This Project You Will Need

   FabScraps Shabby Rose Collection – C85 007
   FabScraps Shabby Rose Collection – C85-003
   Cotton, muslin [cheesecloth], cardstock, leaves and flowers
   Metal foliage dies and a cutting machine
   Sentiment
   Metal ring
   Corrugated cardboard packaging
   Seam binding
   Punch – the word ‘love’


Instructions for your tag
1.              Use C85 007 as your background paper – front side.
2.            Cut two tag shapes, one with your paper and one on white cardstock to give your tag a little more oomph.
3.            Cut another two shapes [remember you are making a double set of tags].
4.            Adhere paper tag to the cardstock tag base.
5.             Adhere a little corrugated cardboard packaging to give height to your embellishment cluster.
6.            Then adhere a little muslin [cheesecloth], some punched out paper foliage using C87-003, adhere a variety of leaves, a little cotton and then your flower on the top.
7.             On one of the tags I have punched out the word sentiment ‘love’ in both white cardstock and again using C85-007 and adhered to one and other.
8.            And on the second tag, the word ‘sisters’ along the bottom right hand side of your tag.
9.            Punch tags and thread through metal ring and tied seam binding between them.

10.        All done.